In this article I will expand on the example in Get Value From Ranges to show you how you can use Get Value From Ranges (GVFR) with either a relative knob/encoder (aka Endless Knob) and briefly touch on doing the same with a button at the end of this article.
In the above linked article, we used GVFR to create custom functionality which controls Ableton’s Clip Trigger Quantization Menu using a knob on our MIDI controller.
The knob in our example was an Absolute style control, which sends a range of MIDI velocity values from 0 – 127.
Although the example I use is for the Clip Trigger Quantization Menu, you can apply this with other paramaters and menus in Ableton Live which also use a range of values.
Background information
I recommend that you first visit the below pages to familiarise yourself with the required background information before attempting to follow this article.
Learn about how Get Value From Ranges works and the original example which we will be expanding on: Using Get Value From Ranges
Learn about the the differences between Control Types: Absolute, Relative, On/Off Inputs and MIDI Velocity
How to find out the MIDI Velocity data which your Encoder sends when you turn it: MIDI Velocity Settings.
The attached script
I have provided a pre-built script which contains all of the Reactions explained in this article.
After downloading/importing it into your copy of CSS, you will need to configure the Reactions to work with your own MIDI Controller Template.
Open each Reaction and select the correct input where you see knob 2 is set:
Set listeners:
Set Conditions. I would recommend duplicating the condition first, as when you select a new option in the left menu of the condition, the middle and right menus will reset.

Overview
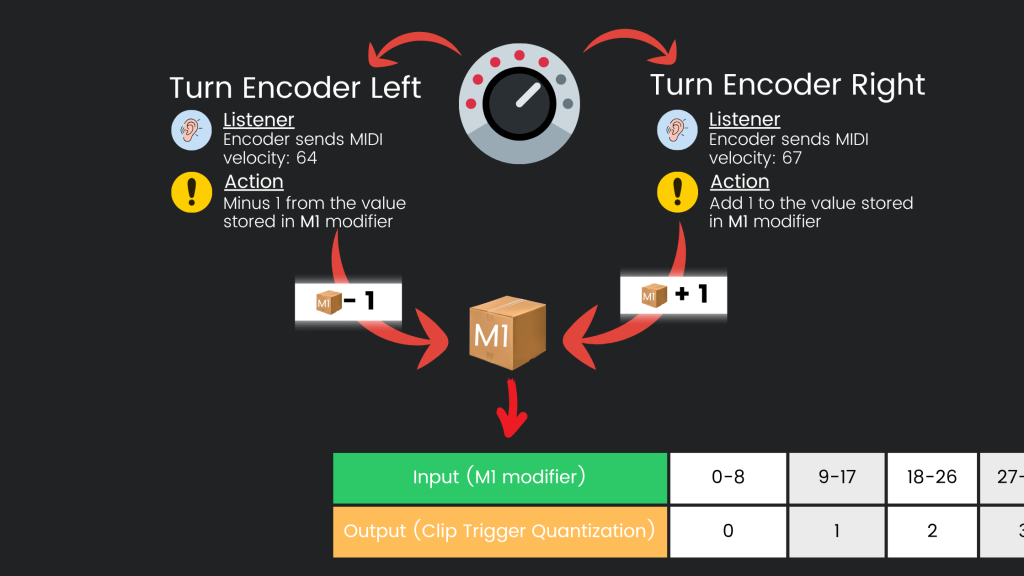
The main difference between using an Absolute input and Relative input with GVFR is that Relative inputs require the usage of a modifier in the GVFR config rather than the controller input’s current value.
The Modifier will be used as a placeholder for the Absolute style range value (0 – 127), effectively sitting between the encoder and the GVFR
The Relative knob will update the value of the modifier by adding or subtracting 1 with each turn.
See the below diagram to help you visualise how this will work…
We will need 3 Reactions for this to work, with an optional 4th Reaction (to avoid a value jump when the script is first initialised):
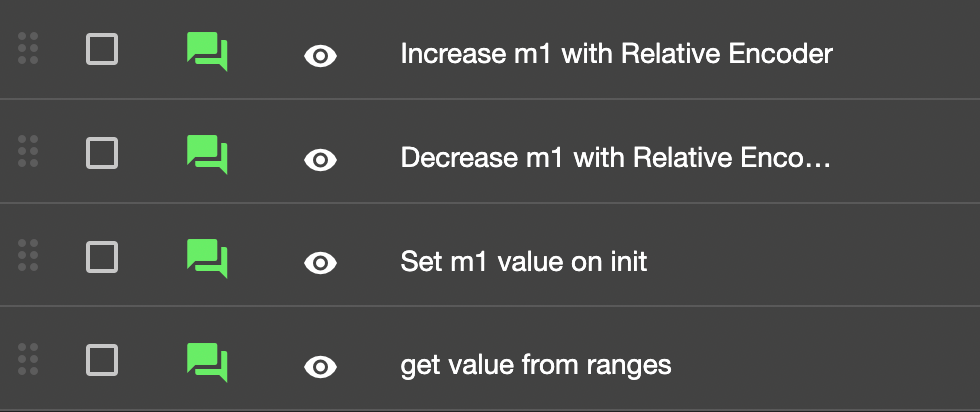
1. Increase m1 value with the Relative Encoder
When you turn the relative encoder to the right, it sends a specific MIDI value (i.e. 67).
When this MIDI value is received by the script, increase the value of the M1 modifier by 1
Info: How find the MIDI Velocity sent by your Encoder
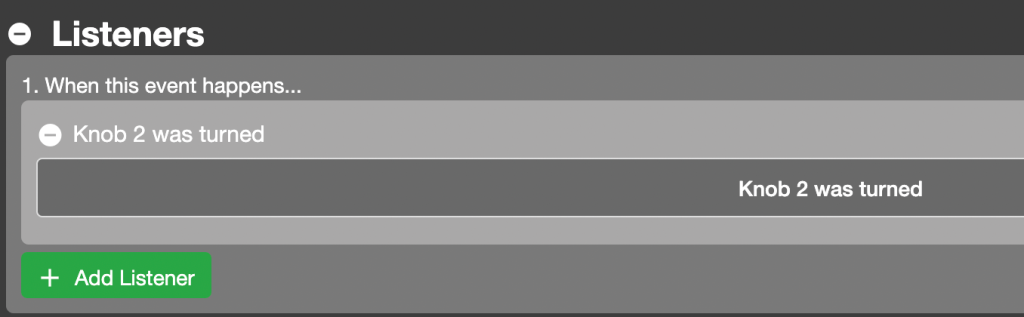
Listener
Select the midi controller knob/encoder which you want to control this withMIDI controller > Knob was turned
Conditions
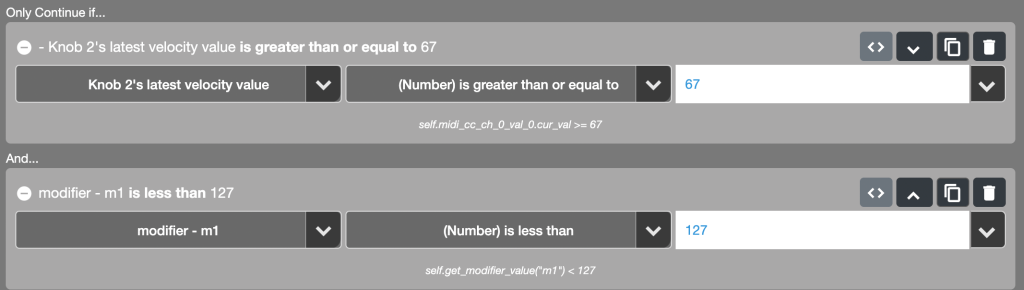
Here we will use 2 conditions…
If the knob’s current MIDI velocity value to equal to: i.e. 67 (the velocity value which the encoder sends when turning right)
Midi controller > Current Velocity values > knob's latest velocity value… (Number) is greater than or equal to or you can use (Number) is equal to...67
And…
If M1 modifier is less than 127 (this ensures the modifier doesn’t go higher than 127)
script > Modifiers > m1... (number) is less than... 127
Action
Set the value of modifier m1:
Script > Modifiers > Set value of a modifier
Modifier: m1
Value to set (set this field to ‘custom code’ and enter the following):
self.get_modifier_value("m1") + 1
The above code adds 1 to the value of m1.

2. Decrease m1 value with the Relative Encoder
When you turn the relative encoder to the left, it sends a specific MIDI value (i.e. 65).
When this MIDI value is received by the script, decrease the value of the M1 modifier by 1
The setup of this Reaction is very similar to the Reaction to Increaseing M1 value (above), with a couple of minor tweaks.
Listener
Select the midi controller knob/encoder which you want to control this withMIDI controller > Knob was turned
Conditions
Here we will use 2 conditions…
If the knob’s current MIDI velocity value to equal to: i.e. 65 (the velocity value which the encoder sends when turning left)
Midi controller > Current Velocity values > knob's latest velocity value… (Number) is les than or equal to OR YOU CAN USE (Number) is equal to...65
And…
If M1 modifier is less than 127 (this ensures the modifier doesn’t go higher than 127)
script > Modifiers > m1... (number) is greater than... 0
Action
Set the value of modifier m1:
Script > Modifiers > Set value of a modifier
Modifier: m1
Value to set (set this field to ‘custom code’ and enter the following):
self.get_modifier_value("m1") - 1
The above code deducts 1 from the value of m1.
3. Get value from ranges
Listens for when the M1 modifier is updated, then uses the value of m1 to decide what to set the output range to (for this example: Clip Trigger Quantization).
Listener
script > Modifier > m1 was updated
Setting the listener to this means that the Reaction will fire whenever the m1 modifier is updated (even if the value remains the same).

Action
Live Object Model > Song > Set Clip Trigger Quantization
Then set the ‘Number’ field to ‘get value from ranges’.
The difference here to our original example is that the Current Input value uses the m1 modifier value. See the image below for all of the GVFR settings.
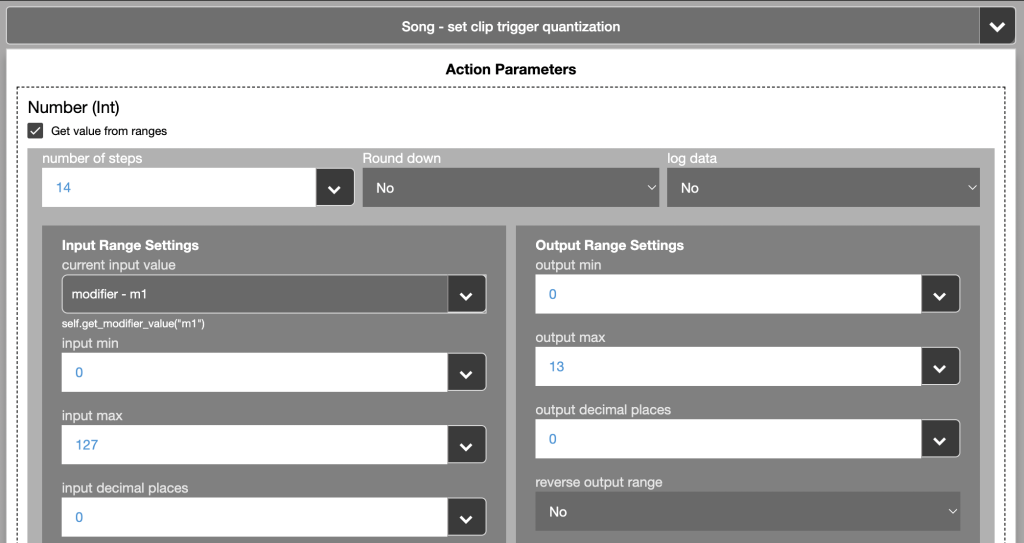
Fine tuning the ‘speed’ of the turn
Reduce the ‘input max’ value to increase how quickly the next step in the range is reached.
Example, if you set the input max to 13 (to match the output range). This would mean that each time a MIDI velocity is received, the Clip Trigger Quantization would move to the next step.
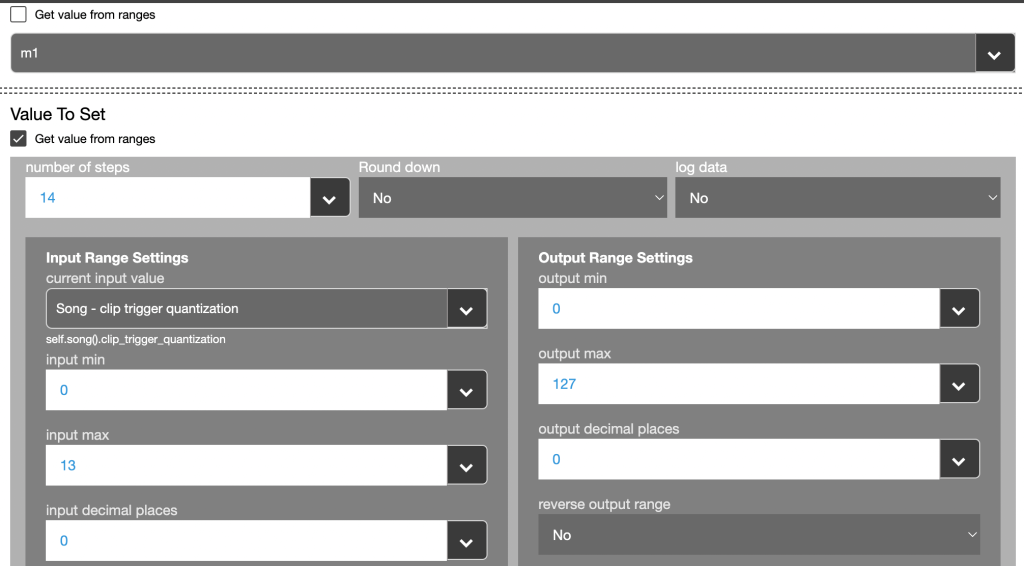
4. Set m1 value on script init (optional)
When the script first loads, set the value of the m1 modifier based on the current position of Clip Trigger Quantization.
This will avoid a value jump when you first turn the encoder as the m1 modifier will be set to the correct value to begin with.
Listener
Script > Script is initialised
Action
Script > Modifiers > set the value of a modifier
Modifier: m1
Value to Set: (set this to Get Value From Ranges). See the images below for the settings, you’ll notice that for this action we are using the value of the ‘clip trigger quantization as the input, and the 0 – 127 range as the output to assign the m1 value.
Side Note: Using 2 Buttons with ‘Get Value From Ranges’
To do this with 2 buttons, you could use the same concept of increasing and decreasing the value of m1 with the buttons and then adjust the configurations in the GVFR as in the below image.
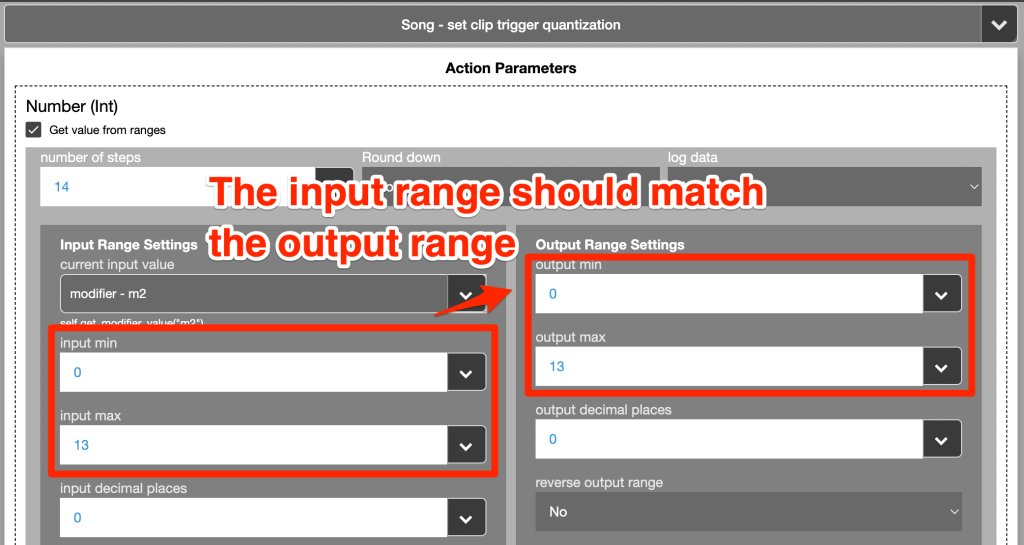
Having the input and output ranges the same, lines them up so that each time the button is pressed, the clip trigger quantization moves to its next step each time.

But then, if you think about it, you wouldn’t need to use GVFR at all as you could simply set the clip trigger quantization > number to the value of the modifier as in the below image…

… because the m1 value would always be the same value which needs to be set to Set Clip Trigger Quantization number. 0 => 0, 1 => 1, 2 => 2… and so on.
I hope this has helped. If you feel that further info is needed on some aspect of this, let us know in the community forum.